Searching to enhance precision and efficiency in sheet metal bending operations? Mastering the art of metal bending is crucial for business owners in the industry, as it directly impacts product quality and efficiency.
As an expert in sheet metal bending with years of hands-on experience and industry knowledge, I understand the challenges and complexities of this process.
Bending sheet metal is a crucial fabrication process involving the deformation of metal into angular shapes using specific machinery and techniques.
In this detailed guide, we will delve into discovering the 10 essential steps that are important for mastering sheet metal bending, ensuring both accuracy and productivity in all operations.
Read on to learn more!
Step#1 Selecting the Right Sheet Metal
To begin the sheet metal bending process effectively, selecting the appropriate type of sheet metal is critical. Here are the steps involved in making the right selection:
- Metal Thickness: Determining the thickness of the metal is essential. Thicker metals require more force to bend and might need specialized machinery. Assess the requirements of the project and choose a thickness that balances bendability with the necessary strength.
- Metal Type and Grade: Consider that different metals react differently when bent. For instance, aluminum is more malleable than steel. Choose a metal type and grade based on the desired flexibility, strength, and end-use of the product. Remember, all metal type also comes with unique spot prices.
- Metal’s Grain Direction: Understand that sheet metals have a grain direction, much like wood. Bending parallel to the grain offers more resistance and can result in cracking. Always identify the grain direction and plan the bending process accordingly to avoid material fatigue or failure.
- Surface Finish and Treatments: Evaluate the surface finish and any pre-treatments of the metal can affect the bending process. For example, pre-painted metals might crack or peel when bent. Choose a metal with a surface finish suitable for bending and the intended application of the final product.

Step#2 Gathering Necessary Tools and Equipment
Having selected the right sheet metal, the next step is assembling the essential tools and equipment for a successful bending process. Let’s break down the key components needed for this task:
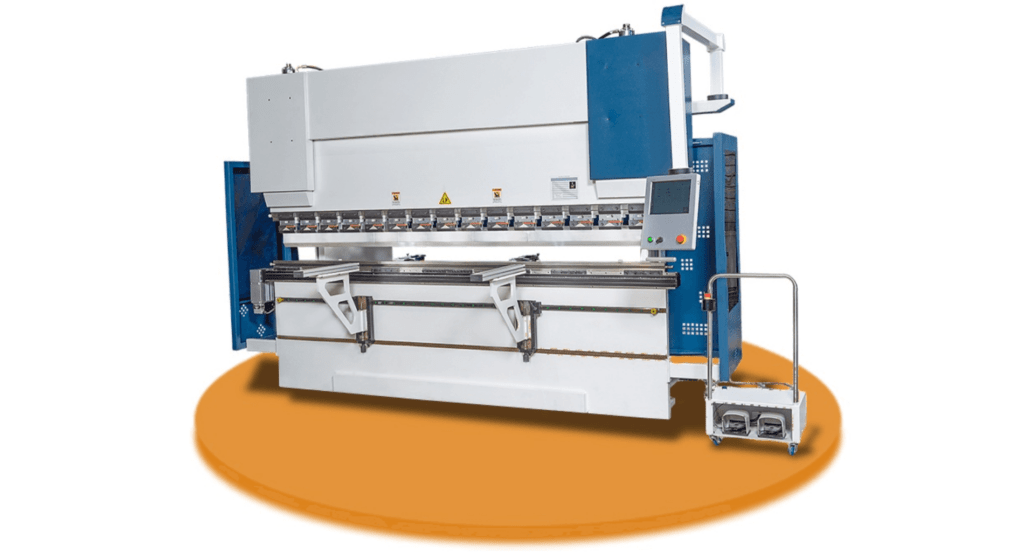
- Press Brake Machine: The cornerstone equipment for bending sheet metals is the press brake machine. This machine provides the force and precision required for accurate bends. Ensure the machine is calibrated according to the metal type and thickness.

- Appropriate Dies and Punches: Gather the right dies and punches for the press brake. These tools determine the angle and radius of the bend. The choice of dies and punches should align with the specific requirements of the project, considering factors like metal thickness and bend complexity.
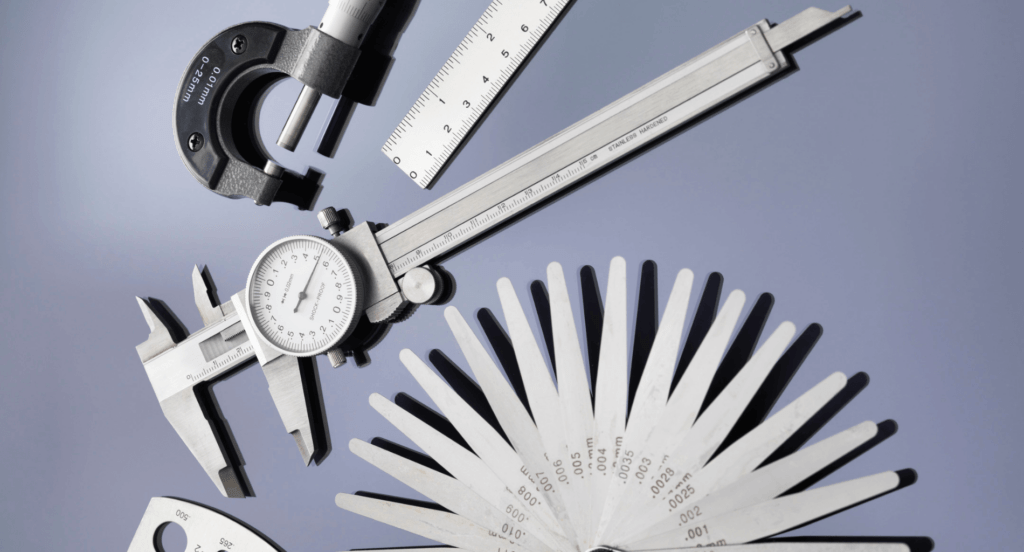
- Calculations and Alignment Tools: It is essential to focus on precision calculations and alignment tools such as protractors, angle finders, and calipers. These tools are important for achieving accurate bends and maintaining consistency across multiple pieces.
- Safety Equipment: Never underestimate the importance of safety equipment. This includes gloves, goggles, and other protective gear. Zemetal’s services emphasize the importance of safety in all metalworking processes, ensuring a secure environment for the team while handling these powerful tools.
Step#3 Measuring and Marking the Metal
After gathering the necessary tools and equipment, the next crucial step is measuring and marking the metal accurately. Let’s explore the essential aspects of this process:
- Marking the Bend Lines: Mark the bend lines on the metal. Ensure that these markings are aligned with the measurements and the grain direction of the metal. For example, if creating a 90-degree bend, the line should be marked exactly where the bend will start.
- Accounting for Metal Springback: The factor in metal springback is the tendency of metal to return slightly to its original shape after bending. Studies have shown insufficient stretching below the targeted 2% post-stretch may not sufficiently address springback.
- Double-Checking Measurements: Always double-check the measurements and markings before proceeding. This step is crucial to avoid costly mistakes and material wastage. Ensure that each measurement and marking is consistent with the project specifications and requirements.
Step#4 Setting Up the Bending Brake
With the metal measured and marked, the next step is setting up the bending brake correctly for precise bends. Here are the key steps to ensure an efficient setup:
- Securing the Brake: Securely mount the bending brake to a stable work surface. This stability is crucial for both safety and accuracy. Ensure that the brake is level and firmly attached to prevent any movement during the bending process.
- Installing the Correct Die and Punch: Install the appropriate die and punch on the brake based on the thickness and type of metal as well as the desired bend angle. If working with a thick steel plate, use a die with a wider opening to accommodate the material without causing damage.
- Adjusting the Bending Angle and Depth: It is essential to understand how to adjust the bending angle and depth settings on the brake. This should align with the project requirements. Most modern brakes come with digital angle gauges for precise adjustments.
- Testing the Setup: Performing a test bend using a scrap piece of the same metal is important. This step helps verify that the brake is properly set up and that the desired bend angle and depth are achieved. Adjust the settings as needed based on the outcome of this test bend.
Step#5 Clamping the Sheet Metal in Place
After setting up the bending brake, the next critical step is to clamp the sheet metal securely in place. See the following steps to ensure the metal is positioned correctly for bending:
- Aligning the Sheet Metal: Aligning the sheet metal on the brake ensures that the bend line matches the edge of the die. This alignment is crucial for achieving the desired bend. The metal should be positioned so that the marked line is exactly where the bend will occur.
- Securing with Clamps: Secure the metal using the clamps on the brake. The clamps should hold the metal firmly to prevent any movement during the bending process. Ensure the clamps are tightened evenly across the length of the metal to maintain uniform pressure.
- Checking for Uniform Pressure: Proceed to check that the pressure applied by the clamps is uniform across the metal. Uneven pressure can result in inaccurate bends or warping of the metal. This step is essential for maintaining the quality and consistency of the bends.
- Utilizing Specialized Clamping Tools: These tools can offer additional precision and control, particularly for complex designs or when working with delicate metals. Zemetal’s services offer expertise that can be invaluable in ensuring optimal outcomes in specialized bending tasks.
Step#6 Performing the Bend
Once the sheet metal is clamped securely in place, it’s time to execute the actual bending. See the following key steps to perform this crucial phase effectively:
- Applying Pressure Gradually: The bending process begins by applying pressure to the brake handle or foot pedal gradually. This steady application of force helps ensure a clean, consistent bend. Be mindful of the force required; too much can over-bend the metal, while too little might result in insufficient bend.
- Monitoring the Bend Angle: Keep a close eye on the bend angle while applying pressure. Many modern bending brakes have angle indicators to assist with this. If the brake doesn’t have one, use an angle finder or protractor to check the bend angle during the process to ensure accuracy.
- Releasing Pressure: Once the desired angle is achieved, carefully release the pressure and remove the metal from the brake. See the bend immediately to ensure it meets the project specifications. If the bend requires adjustment, reposition the metal and apply further pressure.
Step#7 Checking Angles and Precision
After performing the bend, it’s crucial to verify the accuracy of the angles and overall precision of the work. Let’s see the essential steps to ensure that the bending results meet the exact specifications:

- Using Precision Measuring Tools: Employ precision measuring tools like angle finders, protractors, or digital angle gauges to check the bend angle. Place these tools along the bend to measure the angle precisely. This step is vital to ensure that the bend meets the design requirements.
- Inspecting for Consistency: Inspect the bend for consistency along its length. This is especially important for longer bends where deviations can occur. Use a straight edge or a laser level to check that the bend is uniform from end to end. Any inconsistency might indicate uneven pressure during bending.
- Confirming with Project Specifications: Compare the bent metal with the project specifications. Ensure that the dimensions, angles, and overall form align with the design plans. This comparison is crucial for projects where precision is key, such as in custom fittings or complex assemblies.
Step#8 Repeating the Process for Additional Bends
Once done with the angles and precision of the first bend, and if the project requires additional bends, it’s important to repeat the process accurately. Below are the steps to ensure consistency and precision:
- Marking New Bend Lines: If additional bends are needed, carefully mark the new bend lines on the metal, taking into account the effects of the previous bends. The positioning of these lines should be precise, as earlier bends can slightly alter the dimensions of the metal.
The table below outlines the essential steps in adding additional bends to metal, highlighting the importance of precision in marking and adjusting for the impact of previous bends.
| Action | Note |
| Identify the need for additional bends | Evaluate the project requirements |
| Mark new bend lines | Use precision tools for accurate marking |
| Account for previous bends | Adjust measurements to compensate for alterations |
| Apply the new bends | Follow standard bending procedures |
| Verify dimensions post-bending | Ensure the final product meets specifications |
- Adjusting for Material Springback: Remember to adjust for material springback with each new bend, as same with the first. The amount of springback can vary depending on the type of metal and the number of bends already made. This step is crucial for maintaining accuracy in the final shape.
- Clamping and Bending Again: Securely clamp the metal in the brake again, ensuring it’s aligned correctly for the new bend. Repeat the bending process with the same care and attention to detail as the first bend. Consistency in clamping pressure and bend angle is key for achieving uniform results.
- Verifying Each Bend: After each new bend, use measuring tools to verify the angle and precision. This step is essential to ensure each bend aligns with the project specifications. Any discrepancies should be addressed immediately before moving on to the next bend.
Step#9 Finishing Touches
After completing all the necessary bends, it’s time to apply the finishing touches that will enhance the appearance and functionality of the bent sheet metal. Let’s explore the steps involved in this final phase:
- Deburring Edges: Address any sharp edges or burrs left from the bending process.Use deburring tools or sandpaper to smooth out these areas. This not only improves the safety and handling of the metal piece but also prepares it for any further finishing, like painting or coating.
- Cleaning the Metal Surface: Clean the metal surface to remove any marks or residues from the bending process. Use a suitable cleaner that won’t damage the metal. A clean surface is crucial, especially if the metal undergoes additional treatments like painting or powder coating.
- Applying Protective Coatings: It is essential to apply protective coatings to the metal. This could be a rust inhibitor, paint, or powder coat, depending on the metal type and the intended use of the piece. These coatings not only enhance the appearance but also protect the metal from environmental factors.
Step#10 Final Inspection and Quality Check
With the finishing touches applied, the last and crucial step is conducting a thorough final inspection and quality check. Here’s the systematic approach to ensuring bent sheet metal meets all standards:
- Defects: Visually inspect the entire piece for any surface defects, irregularities, or inconsistencies. Look for scratches, dents, or uneven coatings that might have occurred during the bending or finishing process. This is the first line of defense against quality issues.
- Dimensional Accuracy Verification: Verify the dimensional accuracy of the piece. Use precision tools like calipers and rulers to measure the dimensions and compare them against the project specifications. This includes checking the lengths, widths, angles, and radii to ensure they all match.
- Checking for Structural Integrity: Check the structural integrity of the piece. Ensure that the bends have not compromised the metal’s strength and that there are no cracks or weak points, especially along the bend lines. This is particularly important for pieces that will be subjected to physical stress.
- Review Against Quality Standards: Review the completed piece against established quality standards and client requirements. This comprehensive review should cover aspects like the accuracy of the bends, the quality of the finish, and the overall craftsmanship.
Conclusion
In mastering these 10 essential steps for bending sheet metal, businesses can ensure precision, efficiency, and high-quality outcomes in their metalworking projects. This guide serves as a comprehensive roadmap, simplifying complex procedures into manageable tasks.
For expert assistance and access to top-tier bending services, consider partnering with Zemetal. Our team is ready to elevate your projects with unparalleled expertise and precision. Feel free to contact us today!
Dive Deeper Into Our Resources
Looking for more diverse service options? Browse through our handpicked selections:
For some insightful reads, we’ve curated a list of recommended articles just for you:
Sheet Metal Manufacturing and Industry
Still haven’t found what you’re looking for? Don’t hesitate to contact us. We’re available around the clock to assist you.


